
Last week, I launched The Toolbox, a directory of useful one-page sites and apps. It got upvoted a lot on Hacker News, then went viral on Twitter, and got about 11k visitors on the day of the launch.
Since then, I’ve had a couple people ask me why I launched that site, and what kind of tools I used to do it. But first, let me share some stats for the first 10 days.

Stats for the first 10 days
- The site got 60,242 visitors
- It got 138,419 pageviews
- It was tweeted out 1,187 times, got 548 likes, and 191 +1’s
- There are now 80 tools on it, which means I’m adding them at a rate of about 5 a day
- People voted 10824 times to indicate which sites they used.
Perhaps the most impressive stat of all: people submitted 364 sites via the site submission form. This revealed a few interesting trends:
- The most submitted site was SubtlePatterns, with 8 distinct submissions.
- ColorSchemeDesigner came next with 6 submissions.
- CSS3Please also got submitted 6 times.
- Lorem Ipsum generators as a category got submitted 8 times, even though they are more gimmick than tool in my opinion.
- … and PlaceKitten was submitted 3 distinct times, proving once again that to make something popular on the Internet, just add kittens.
PlaceKitten in use
So why did I decide to create The Toolbox? Simply because it’s a cool idea that I had been thinking about for a while. All I needed was a push in the right direction, and it came last week when I read about CSS Arrow Please on The Industry.
At the end of his write-up, Chris Armstrong asked reader to suggest other similar one-page tools, saying “[he] would love to compile a great list of useful sites to help the whole community”.
This was the spark I needed. I realized that there was no such list available yet (or at least, that I knew of) and it seemed like the perfect week-end project. Never mind that it was actually wednesday, that’s just one of the perks of being self-employed!
A Very Particular Set of Skills
I also had another goal in mind for this project: it would be a way to see how successful a minimalist project like this could become, and how quickly I could turn it around.
After all, being a designer+developer gives me a very particular set of skills, namely the skills to create something out of thin air and make it available to the world.
The thing is, we’re so busy with client projects and bigger undertakings that we rarely fully exercise those skills. For once, I wanted to have an idea and just do it, instead of writing it down in “the List of Doom” (you know, that list of all the great ideas you’ve had that will never see the light of day).

The "List of Doom". No, I have no idea what most of these mean either
So here’s a play-by-play account of the whole thing, from start to “finish” (except of course it’s never really finished…).
Hour 1: Finding a Name
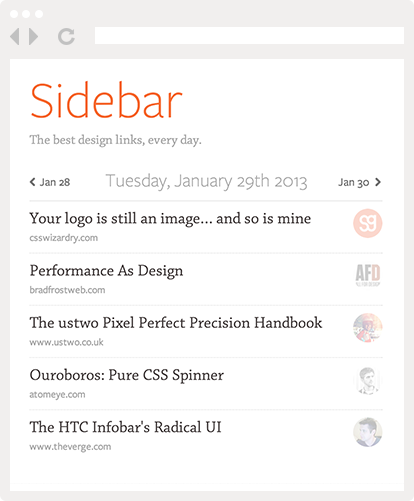
The first order of business was finding a name for the site. Finding a good name can really help give a direction to the whole project, both visually and conceptually. For example, once I found the name “The Toolbox”, it was easy to come up with a metal background and an industrial-looking font.
Speaking of names, it used to be that having an available .com was a pre-requisite. But these days, since it’s pretty much impossible, I don’t even bother. My priorities are name first, domain second, twitter username third.
So I picked “The Toolbox” because it’s a great name that fits the concept, even though neither the .com or the twitter handle were available.
Once you’ve found a potential name, a good way to test it is to imagine it as part of a press release or headline: for example, “______ is a directory of useful single-page apps“, or “world-famous design legend uncovers ______, his revolutionary new directory of useful apps“.
If you can’t find with a name, don’t let it stop you. Just come up with a random codename (like “Project SpaceCyborg”) so you have something to call the project, and move on.
Hour 2: Finding a WordPress Theme
I knew I didn’t want to code the design from scratch. After all my goal was to prove to myself that I could put out a useful product in a minimum amount of time, so every hour counted.
That being said, I also didn’t want to use just any random WordPress theme. I had two conditions: First of all, I knew I wanted a theme with a grid or tile layout. Second, I wanted to find a responsive theme, so that the site would look good on mobile as well.
So I headed over to ThemeForest to browse some themes. While the first condition was easy to fulfill (thanks to Pinterest, tile layouts are more popular than ever), the second one was much harder.
In the end I selected the Construct theme, which fulfilled both conditions and also had the advantage of looking pretty simple and easy to customize.
When selecting a theme don’t buy the flashiest, more distinctive ones, as those are usually the hardest to customize and truly make yours. Better buy one that’s less fancy and a little plain but gets the basics right (i.e. good typography, solid grid layout, good code, etc.).
I was lucky to find the right fit on the first try, but when you’re shopping for themes be prepared to have to buy 2 or 3 to really evaluate them before you find the perfect match.
Hour 3: Setting Up WordPress
Now that I had my theme, it was time to set things up. I use PHPFog for hosting, and they make things very easy by letting you manage everything through Git.

GitHub for Mac, an awesome (and free) app
Note: you don’t actually need a GitHub account to use the GitHub app for Mac, so it makes a great free Git client.
So I created a new WordPress app (takes about 1 minute), then cloned the repository locally and got to work.
I installed a couple basic plugins, such as WP-Migrate-DB to help me migrate the database form my local instance to the production environment, and WP Super Cache to speed up WordPress (more on this later).
It was then time to work on the site’s content.
Hours 4 & 5: Adding the Content
It’s hard to code around an empty site, so I first got to work populating the site with the first couple entries.
I opened up my bookmarks folder and also checked one of my previous posts to find some sites. Between the copying & pasting, taking screenshots, and categorizing the posts, it took me about 2 hours to add the first dozen sites.
Now that I had my content, I could get to work on the design.
Hour 6: Finding the Fonts
If you look at the uncustomized Construct theme, you can see it looks pretty different. The main reason for this, in my opnion, is the typography.
If I were writing this article a couple years ago, now would be the time to open Photoshop and try out some fonts. But thanks to services like Typekit, you can now try out hundreds of fonts right in your browser.

Browsing for fonts on Typekit
Since the site is named “The Toolbox”, I knew I wanted something sturdy and workmanlike. I found exactly that with Kulturista Web, a font from Suitcase Type Foundry. As its description says, “[Kulturista] may be used on heavy machinery and equally well on the cover of a book dedicated to graphic design”.
I also needed a font for the logo. I first tried a couple other “industrial” fonts (the Lost Type Co-op has a nice selection of them), but none really worked.
The reason they weren’t working was that they were clashing with Kulturista. So I decided instead to pick a totally different style of font, and chose the mellow rounded script font Pacifico.
Paradoxically, font combinations usually look better when the fonts are really different, like a serif and sans serif, or slab serif and script.
Hours 7-9: Designing & Coding
Although design and code are usually separate phases for me, in this particular instance I designed straight in the browser since most of the changes consisted in simplifying the theme and tweaking the header.
I also made sure for each new change that it didn’t break the theme’s responsiveness, which slowed down the process a little. But I believe responsive design is here to stay, so I figured I might as well get used to it.

Testing the mobile size
I also spent quite a bit of time on the tweet/like/+1 buttons, since I wanted to find a way to add them to the page without uglifying the whole thing. In the end I hid them away in a drop-down. I’m probably missing out on some shares by doing that, but it’s a price I’m willing to pay.
By the way, I must confess I developed the site in Chrome, and didn’t do any cross-browser testing. And I’m not even talking about IE here, up to now I haven’t even opened the site in Safari or Firefox once. Of course I’d never do this for a more serious project, but I did The Toolbox purely for fun and cross-browser debugging is not really my idea of “fun”…
Hour 10: Adding the Ratings
The site was finished and looking pretty good when I had a sudden realization: viewing the tools by the default chronological order was pretty useless. What people would want to know was which ones were the most popular.
But in order to do this, I first need to collect some data on which tools people used. I knew that I’d get a big traffic spike at launch, so any data collection needed to happen right from the start. So I decided to delay the launch in order to implement the “I use this” button that you see on the site.
The button also lets people interact with the site, which I thought was important. It’s much more fun to scroll down the list to check which tool you’re already using than just browse the site passively.

The button is actually a 1-star rating scale
The implementation itself was extremely easy: I simply used the Post Ratings plugin. It’s supposed to be used as a star rating plugin, but I just set the number of “stars” to 1 and that gave me a binary “I use this”/”I don’t use this” button.
At that point I didn’t have the current filters and sorting options yet, but I decided to launch anyway. I figured as long as I was collecting the usage data right from the start, I could always implement the actual sorting at a later point.
The Eleventh Hour
There are two big rules when launching a project:
- Never launch on a friday
- Never launch late at night
I don’t know if it’s because I broke both of them, but the launch turned out to be pretty bad.
I submitted the site to Hacker News and it took off right away. And it also crashed right away, exploding under the massive influx of traffic.
As the server slowed down to a crawl, it made it impossible for me to access the WordPress back-end to try and figure out the problem. So I quickly upgraded my PHPFog account to a better plan and hoped for the best.
When I finally got through to the WordPress admin, I immediately saw the problem: although the caching plugin was installed and activated, caching was turned off in the plugin’s settings page. Talk about a dumb mistake…
So for the next 2-3 hours after launch, the site was not actually available. That was a bummer, but on the other hand I’ve learned to accept that this kind of thing is bound to happen from time to time. And while a successful launch is always gratifying, what really counts is whether people keep coming back to your site the next week, month, or year.
Post-Launch
Despite the technical difficulties, I was pretty happy: once they could actually access the site, people seemed to really like it.
In fact they liked it so much that they started submitting their own suggestions, and pretty soon the number of tools on there jumped from 40 to 70.
As the number of tools grew, the site was becoming a better resource, but also harder to browse. So I knew I had to do something before it became unusable and started turning people away.
Various Bits of jQuery
So I implemented a simple CSS-class-based filtering system in jQuery:
$('#filter li').click(function(){
	var activeFilter=$(this);
	var selector = activeFilter.find('a').attr('data-filter');
	var items=$("#container .item");

	$('#filter li').removeClass('active');
	activeFilter.addClass('active');

	if(selector=="all"){
		items.show();
	}else{
		items.each(function(){
			var item=$(this);
			if(item.hasClass(selector)){
				item.show();
			}else{
				item.hide();
			}
		});
	}
	return false;
});
The code basically retrieves the “data-filter” attribute of the filter link you clicked, and then hides every item except the ones who have that data-filter attribute as a class.
On top of filtering, I also added sorting and search and used the following plugins:
- TinySort for sorting
- jQuery Livesearch for the live search
- JAIL for asynchronous image loading
Of course, since the sorting and filtering are all Javascript based it means that all the content needs to be loaded on the page first. This works with 70 tools, but wouldn’t be appropriate with 200 or 300 entries. I’ll cross that bridge when I reach it though, and for now I’m doing fine with my couple lines of Javascript.
I also got in touch with Yoggrt to ask them if they wanted to put up an ad on the site. I don’t have any numbers to share yet, but if the ad can buy me lunch out once a week I’ll call it a success!
So What Now?
This pretty much wraps it up. I’m not planning on adding new features for now, so I’ll focus on adding new tools and promoting the site.
And as you can see the site is pretty simple, showing that you don’t need to spend hundreds of hours to make something popular.
So next time you have a cool idea, don’t just write it down on your to-do list. Take a day off, call in sick, or quit your job! I don’t care how you do it, but find the time and make your idea come true. I promise you won’t regret it!
Pingback: Article: The Toolbox: From Idea to Launch in 10 Hours « My Blog
Pingback: The Toolbox: From Idea to Launch in 10 Hours | SachaGreif.com » Web Design
Pingback: $110K + for a hardware startup, the problem with targeting mid-market companies and more | 21times
Pingback: State of Technology #60 « Dr Data's Blog
Pingback: Graph&Design » Blog Archive » The Toolbox
Pingback: The Toolbox: From Idea to Launch in 10 Hours « Coffee & diamonds – Information about the Java and Ruby worlds!!!
Pingback: Un ejemplo a seguir
Pingback: A Collection of Design Case Studies | SachaGreif.com
Pingback: Making of: typespiration.com — Rafal Tomal